Unveiling Diamond Art: Step-by-Step Crafting Brilliance
Crafting is a timeless hobby that allows individuals to express their creativity while also enjoying a relaxing pastime. One craft that has become increasingly popular is diamond paint, which combines the meditative quality of mosaic making with the satisfaction of creating stunning, sparkling designs. In this comprehensive guide, we will walk through what diamond art is and provide you with all the tools and techniques you need to create your own dazzling masterpiece.
What is Diamond Art?
Diamond art, also known as diamond painting, is an exciting and relatively new crafting technique that has gained a loyal following among art and craft enthusiasts. The process involves creating a mosaic-like design using small, faceted pieces of resin that resemble diamonds, or, more commonly, square or round drill beads.
This art form is often compared to cross-stitching, but with some distinct differences that make diamond art a unique and engaging experience. The use of vibrant, glittering ‘diamonds’ creates a look that is both eye-catching and chic, making diamond art a lovely addition to any home décor. The satisfaction of seeing a design come to life under your fingertips is what draws people to this craft, and its accessibility makes it suitable for all ages and skill levels.
Getting Started with Diamond Painting
| Get the Materials | Make sure you have all the supporting supplies for the diamond art painting you are wanting to do |
| Choose the Kit | Keep your first diamond painting kit simple and work a few easier diamond painting kits before advancing to more complex projects |
| Doing the Diamond Art | Start applying the diamonds and try different application approaches to find what works and feels the best for you. |
| Finish and Display | Seal the piece when done. Decide if you want to frame it or if you are going to give it as a gift. Lots of options for mounting to help provide the piece stability. |
| All Done | Don’t be surprised if you find there are lots of left over diamonds, wax and other materials. |
Materials Needed for Diamond Art
To begin your diamond painting journey, you’ll need a few essential materials. These can vary based on the kit you choose but generally include:

- A canvas with an adhesive design
- Diamond beads (often color-coded for easy reference)
- A diamond applicator tool
- A wax pad for the applicator
- Tweezers (optional but useful for precision work)
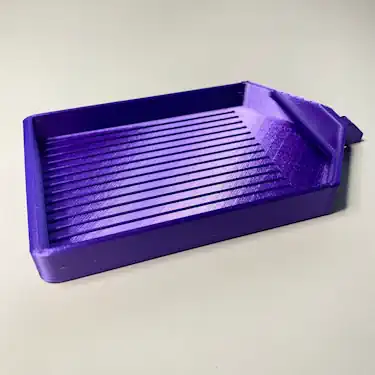
- A diamond tray (also optional, but helpful for organizing beads)
- A frame (included in some kits, or purchased separately)
Choosing a Diamond Art Kit
One of the most critical decisions when starting a diamond art project is selecting the right kit. Kits differ in complexity, design, size, and included accessories. Beginners may want to start with a smaller kit to get a feel for the process, while those with experience may prefer a larger, more intricate design to sink their teeth into.
Look for kits with high-quality materials to ensure that your finished piece will be durable and long-lasting. The canvas should be thick enough to support the weight of the beads without warping, and the beads should be consistent in size and shape for a uniform finish.
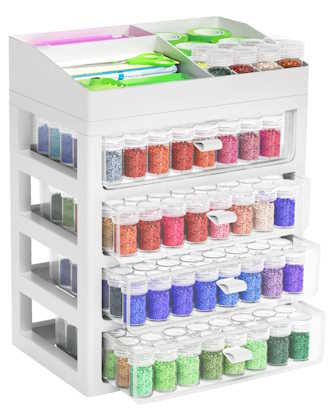
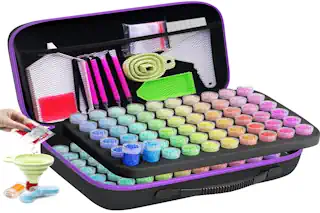
Diamond Containers
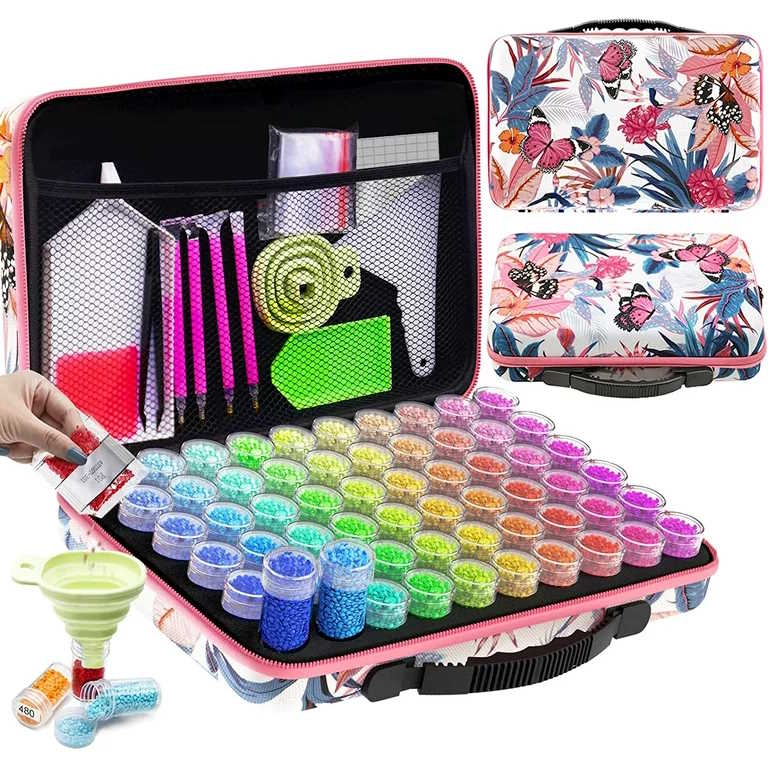
To streamline the diamond art process, experienced crafters recommend sorting your beads into dedicated containers or sorting bottles before beginning your project. This not only saves time when applying the diamonds to the canvas but also prevents any possible loss or mix-up of colors. Containers with multiple compartments, such as bead storage boxes or pill organizers, can be incredibly helpful for keeping your diamonds sorted and within easy reach. Labeling each section with the corresponding diamond color code from your kit further enhances efficiency, ensuring a smooth and enjoyable crafting journey.
Preparing the Canvas
Before you start placing diamonds on your canvas, it’s crucial to prepare a flat surface. Lay the canvas on a flat, clean work surface and gently roll it with a tube or similar tool to remove any creases. Sometimes, kits will also include a clear plastic film to place over the canvas as you work, which helps protect the adhesive and reveals the design more clearly.
Using the wax included in your kit, coat the tip of the diamond applicator tool. This will help the diamonds stick to the tool, making them easier to handle and apply to the canvas.
Doing Diamond Art
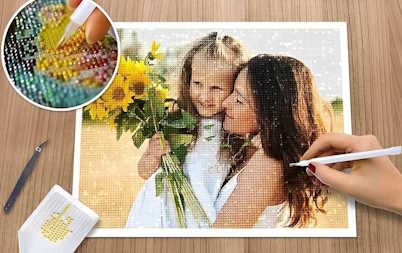
Applying the Diamonds onto the Canvas
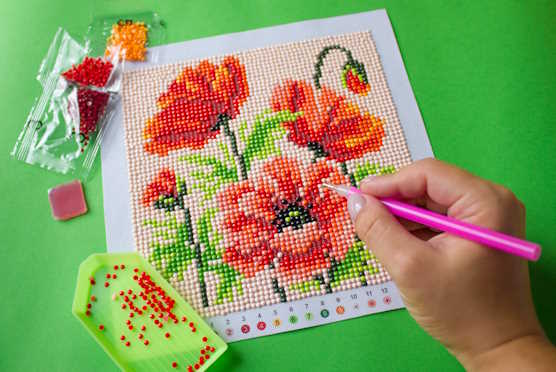
Now comes the fun part – bringing your diamond art to life! Start at the bottom of the canvas and work your way up, peeling back small portions of the protective film on the canvas to expose the adhesive. Use the applicator tool to pick up a diamond and place it on the corresponding symbol on the canvas. The color coding on the canvas and in the bead containers make this process straightforward, and before you know it, your image will start to shine.
Perfecting the Technique
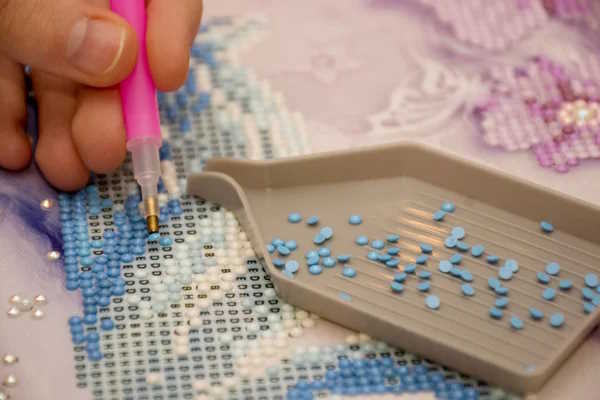
It’s all in the technique when it comes to diamond art perfection. Holding the applicator tool like a pen, gently press the tip coated with wax onto the top of the diamond. A firm yet gentle touch is key; it allows the diamond to adhere to the tool without getting buried in wax. Position the diamond directly above the corresponding area on the canvas and lightly press down to affix the diamond to the adhesive surface. Ensuring the diamonds are placed straight and in the correct order is essential for the overall aesthetic of the final piece.
Utilizing Additional Tools
Some diamond art enthusiasts find that additional tools can greatly enhance the crafting experience. Tweezers, for instance, offer more control for placing and adjusting diamonds, particularly in tight spaces or when correcting mistakes. For those looking to expedite the process, multi-diamond applicator tools are available that allow for the placement of several diamonds simultaneously, which can be especially helpful for larger blocks of color. Regardless of the tools you choose, ensuring a comfortable grip and a steady hand will contribute to the seamless appearance of your artwork.
Enhancing Visibility with LED Light Boards
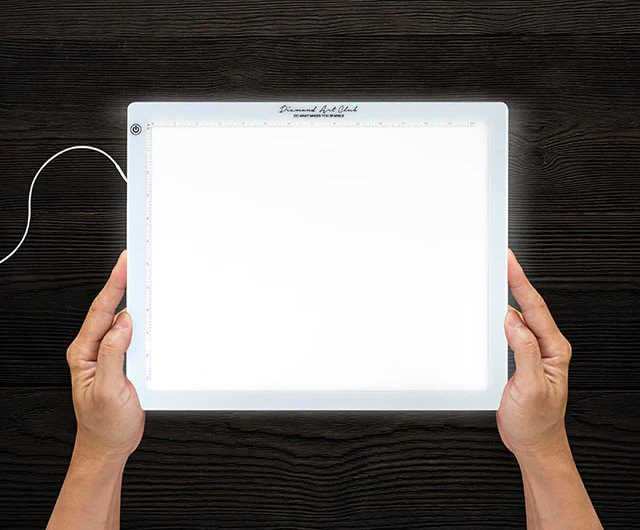
As you delve deeper into the world of diamond art, you may encounter challenges with visibility, especially when working with intricate designs or in low-light conditions. This is when an LED light pad can become a game-changer. These thin, illuminated panels sit beneath your canvas, casting a soft but bright light that helps to highlight the symbols on your design. Not only does this make it easier to identify where to place each diamond, but it also can reduce eye strain, allowing you to enjoy longer crafting sessions. Moreover, the LED light board adds an element of excitement to the process, as your artwork seemingly glows from within, setting off the diamonds’ sparkle even before the project is completed.
Overcoming Challenges in the Process
The process, while relaxing, does come with its challenges, such as dealing with static-clingy diamonds or placing beads in intricate patterns. Should diamonds clump together or stray from their designated spot, a gentle brush or shake of the diamond tray can separate them. For challenging patterns, stepping back and studying the canvas from a distance can provide a new perspective, making complex sections more manageable. With patience and a bit of practice, even the most complicated patterns will fall into place, leaving you with a radiant piece of art that’s a true reflection of your dedication and fine motor skills.
Tips for Achieving Precision and Accuracy
Patience is key to achieving a high level of precision in your diamond art. Take your time to ensure each diamond is placed neatly and securely. It’s also helpful to work in good light and keep a steady hand. Some people find it useful to work in sections, completing one color or area at a time, which can help with focus and accuracy.
Dealing with Different Diamond Shapes and Sizes

Some kits come with diamonds in various shapes and sizes to add depth and detail to the design. For designs with special diamonds, pay close attention to the key provided and the layout of these different elements within the design.
When working with different sizes, it’s even more crucial to ensure the right placement to maintain a consistent and aesthetically pleasing final product.
There are round and square diamonds and application is not always the same. Be sure when selecting a diamond painting project to check the shape of the diamond as well as the material used to make the diamond painting kit.
The Beauty of Round Diamonds
Round diamonds are predominantly used in diamond paintings due to their classic style and timeless appeal. They are perfect for those who appreciate minute details in their art. These diamonds possess a symmetrical shape which offers vibrant sparkle when they catch the light. Their symmetry allows them to fit evenly against each other, creating a seamless and shimmering surface of brilliance that highlights the intricate patterns in your diamond painting.
The Elegance of Square Diamonds
Square diamonds, on the other hand, offer a different aesthetic appeal. They exude elegance and refinement, making them an ideal choice for artists who favor a more regimented, orderly look in their artwork. They fit perfectly together without any gaps, presenting a tidy, unified mosaic which is pleasing to the eye. The exactness of square diamonds help better define the finer details in your diamond painting, making them stand out even more.
The Craftsmanship Behind Diamond Materials
Lastly, it is crucial to understand the materials used to make these stunning diamonds. High-quality resin is commonly used to create these sparkling gems. The material ensures the diamonds are not only shiny but also durable, able to last for years without losing their luster. The resin diamonds catch the light beautifully, accurately reflecting the colors to give your artwork a radiant glow.
Understanding the materials used in your diamonds can also assure you of their quality, allowing you to fully appreciate the beauty and longevity of your diamond painting.
Finishing and Displaying Diamond Art
Sealing the Finished Artwork
Once you’ve placed all the diamonds and your artwork is complete, it’s time to seal it. Sealing prevents the diamonds from falling off and helps maintain their shine for years to come. Common sealants include clear adhesive sprays or brush-on sealants, and your kit may include one specifically designed for diamond art. A good sealing will definitely enhance the quality and beauty of your diamond painting.
Framing and Hanging Options
To elevate your diamond art, consider framing it. A frame not only protects the work but also provides a polished look. Choose a frame that complements the size and style of your artwork. If your kit didn’t include a frame, measure your finished piece, and select one that fits. To hang your diamond art, hooks, or the wire on the back of the frame are perfect for displaying your masterpiece on the wall.
Caring for and Preserving Diamond Art
Proper care will ensure your diamond art stays looking its best. Avoid displaying your artwork in direct sunlight, as this can cause the colors to fade over time. To clean, use a soft brush and gently sweep over the surface to remove any dust or particles. Never use water or other liquids, as this can damage the adhesive and affect the beads.
Conclusion
Diamond art is a captivating craft that allows anyone to create stunning, shimmering works of art. Whether you’re a seasoned craft veteran or new to the artistic world, the step-by-step process provided in this guide can help you achieve beautiful results. From selecting the perfect kit to displaying your finished piece, each aspect of the diamond art creation is an opportunity to hone your skills and express your unique vision.
The process of doing diamond art is not just about the final product; it’s also about the meditative state achieved through the repetitive motion of placing each diamond. It’s a hobby that provides relaxation and reduces stress while producing art that can be cherished and celebrated. So gather your materials, select a sparkling design, and begin your diamond art adventure today. Your masterpiece is just a few thousand diamonds away!
Frequently Asked Questions (FAQ)
Q1: Can I mix diamond shapes in one painting?
A1: Yes, mixing round and square diamonds in a single painting is possible and can add unique texture and visual appeal. However, it’s essential to plan the layout carefully to ensure a harmonious overall appearance.
Q2: How long does it take to complete a diamond art project?
A2: The time it takes to complete a diamond art project varies depending on the size of the canvas and the complexity of the design. Smaller projects may take a few hours, while larger, more intricate designs could require several weeks or more of work.
Q3: Is diamond art suitable for children?
A3: Diamond art can be a great activity for older children and teenagers who have the patience and fine motor skills required. It’s advisable to select simpler designs for beginners and ensure supervision to handle the small pieces.
Q4: What should I do if I lose some diamonds?
A4: Many kits come with extra diamonds, but if you find yourself short, you can contact the manufacturer for replacements or purchase similar diamonds separately. Keeping your workspace orderly can help minimize losses.
Q5: Can diamond art be recreated or is each piece unique?
A5: While you can purchase kits for popular designs that many people may create, the way you place your diamonds and potentially mix different shapes or colors can make each piece uniquely yours. Custom kits also allow for one-of-a-kind creations from personal photos or designs.
Q6: How do I choose the right sealant for my diamond art?
A6: Select a sealant that’s specifically designed for craft purposes and compatible with resin diamonds to ensure it doesn’t damage the shine or color of your diamonds. Clear adhesive sprays or brush-on sealants are commonly recommended.
Q7: Can I use my own frame or must I use the one provided with the kit?
A7: You can use any frame that fits your completed diamond art. Using your own frame allows for more customization and the possibility to match the décor of the space where you plan to display your artwork.