Mastering the Art of DIY: A Comprehensive Guide to Power Drill Domination
DIY projects can transform your living space, offering a personal touch that is both rewarding and unique. At the heart of many home improvement endeavors lies the unsung hero of power tools— The Power Drill. It’s not just a simple piece of machinery; it’s a versatile wizard’s wand for woodworking, a guardian of garden gates, and a little-known secret weapon for crafting wizards. Whether you’re a weekend warrior tackling your honey-do list or working construction and in need of a new, tested and true, friend, the power drill is sure to play a critical role in your DIY exploits.
Understanding Your Power Drill
Before you can wield the drill like a pro, it’s essential to understand its composition and capabilities. A power drill might seem intimidating at first, but breaking down its components and getting to know its functions will make it much more approachable.
There are many buying options to consider and getting the most powerful drill is not always the best choice. Nor is buying the most expensive drill. Many stores will let you test the drills and show you a combination of options available for each model.
The Anatomy of a Power Drill
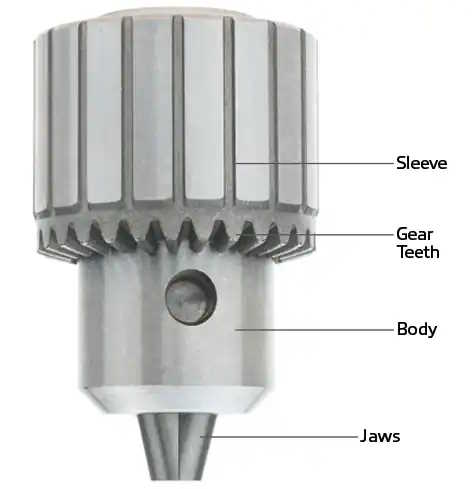
A power drill, at its most basic, is a tool that uses an electric motor to rotate a replaceable bit, the part that actually does the drilling. Firmly grasped in the hand, it has a trigger-like power switch that activates rotation. Understanding the different parts and their purposes is key to mastering your drill’s potential:
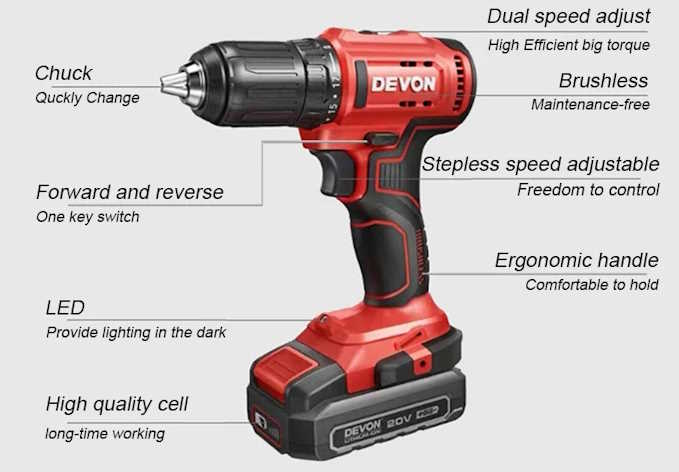
Chuck: This is where the drill bit is inserted and is crucial for keeping your drill bit in place during operation.
Trigger: Varying the speed and controlling when the drill is active is done through the trigger.
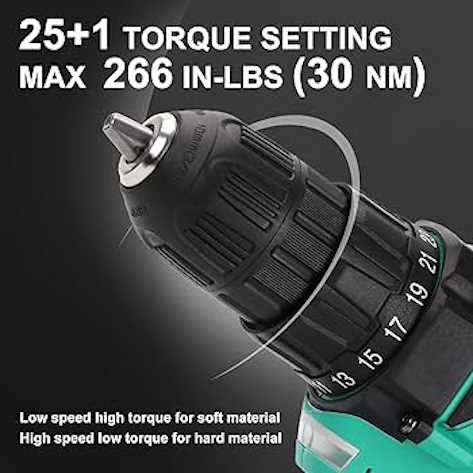
Clutch: Some drill models feature an adjustable clutch that dictates how much torque the drill applies, preventing over-tightening or stripping screws.
Handle: Giving you a secure and balanced grip, the handle is important for stability, especially during high-torque applications.
Deciphering Drill Types
Not all drills are created equal, and your choice should be based on your project’s requirements. Here’s a quick rundown of the most common types you’ll encounter:

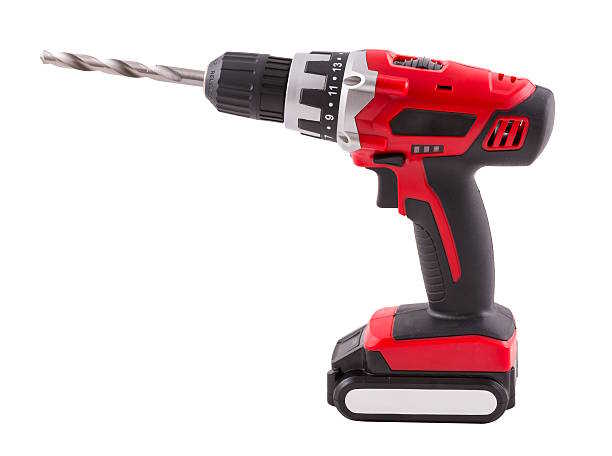
Cordless Drill: Offers unmatched portability due to the absence of a cord and is typically powered by rechargeable batteries. Some come with only one battery but many are now offering kits with two batteries. Some can accommodate a larger battery for extended use at a very reasonable price.
Corded Drill: A more powerful alternative that operates via a constant supply of electricity from a wall outlet. Not always the best option in tight spots but the power never ends.
Hammer Drill: Not only rotates but also moves back and forth—great for masonry work.
Impact Driver: Designed to drive screws more effectively than a standard power drill, ideal for tough fastening jobs.
Safety First, Second, and Always
The magic of the most drills should never come at the cost of your safety. A momentary lapse in judgment can lead to serious injury, which is why it’s crucial to practice and prioritize safety at all times.
Power Drill Safety Gear

Eye Protection: Safety glasses or goggles are non-negotiable. One stray speck of sawdust could have dire consequences for your vision.
Hearing Protection: Drills can be loud, and prolonged exposure can damage your hearing. Earplugs or earmuffs are your buddies, albeit silent ones.
Gloves: Anti-vibration gloves are handy for long drilling sessions but can also protect your skin from sharp edges on materials.
Operating Your Cordless Drills Safely
Firm Grip: Always ensure you have a secure grip on the drill when it’s in use.
Stability: Proper footing and balance will prevent a potential stumble or fall.
Mind the Cord: If you’re using a corded drill, be vigilant of where the cord is at all times to avoid tripping.
Dress Appropriately: Avoid loose clothing and jewelry that could get caught in the drill’s moving parts.
Basic Operations: Nailing the Nitty-Gritty
Changing drill bits and understanding the various settings might seem basic, but they form the foundation of power-drilling prowess.
Changing Drill Bits Like a Boss
Chuck Key Drills: Practice using the chuck key and the process of loosening and tightening the chuck for these drills.
Key-less Chucks: A quicker process but requires a strong grip to loosen and tighten the chuck sufficiently.
Quick Chuck: Allows for swift and effortless bit changes without the need for tools, streamlining your project workflow.
Adjusting Speed and Torque
Speed Adjustment: Slow vs. fast speed can be the difference between delicate woodwork and swift hole creation.
Torque Settings: Prevent stripping screws on softer materials or drill to a consistent depth with clutch or torque adjustment.
Understanding Drill Settings
Most modern drills have multiple settings for different kinds of tasks:
Drill Mode: For traditional drilling through various materials.
Hammer Mode: Used primarily for concrete or masonry work.
Screwdriver Mode: Delivers low torque for screw driving, allowing you to stop before over tightening.
Variable Speed Triggers: This feature gives you exquisite control over the drill’s speed simply by adjusting the pressure you apply to the trigger. Perfect for projects that require a gentle touch or when you’re easing into tougher materials.
Advanced Techniques for the Ambitious
If you’ve mastered the basics and yearn to push the boundaries, there are several advanced power drill techniques just waiting to be explored.
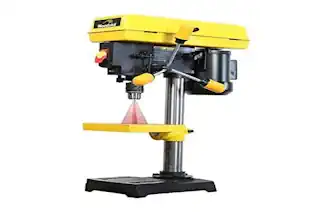
The Drill Press Unleashed
A drill press is a stationary setup with a lever to adjust the drill’s height, ideal for precision drilling. A good drill with support variable speed and many other features.
Tackling Tasks with a Hole Saw Attachment
Selecting the Right Hole Saw: Match your hole saw’s diameter to your project needs.
Using a Guide for Precision: A cutting guide or jig helps create perfect circles and straight lines. A simple trick is to put tape on the drill bit slightly before the depth you need to drill. This helps you hit your measurements on all your holes.
Screwdriver Functions and Mixer Attachments
Screwdriver Bits: Magnetized bits make handling screws easier, and you can choose from a variety of heads to suit different screws. There are many buying options for drill bits. Be sure to understand the drills the bits are made for. Many bits made for other drills are interchangeable.
Mixer Attachments: For those home renovation projects that involve paint or cement.
Maintenance and Care of Your Trusty Drill
No tool lasts forever without proper care, and your power drill is no exception. Regular maintenance is the key to ensuring it remains a reliable companion in your DIY adventures.
Post-Project Drill Care
Clean After Usage: A simple wipe down with a dry cloth can keep dust and debris from interfering with your drill’s function.
Storage: Store your drill in a dry place, preferably in a case, to avoid rust and damage.
Battery Maintenance
Charging: Keep your drill charged but avoid leaving it plugged in indefinitely. A good charger will replenish battery power in less than an hour.
Storage: Batteries should be stored in a cool, dry place, ideally at around 50% charge if not in use for an extended period.
Troubleshooting Common Issues
Overheating: If your drill starts to feel hot, give it a break. Powering through can damage the motor.
Loose Bits: Regularly check the tightness of your drill’s bits to prevent them from falling out during use. Not all brands maintain their grip. Make sure you know the limits of your brand of drills.
In Conclusion: The Power Drill as Your DIY Ally
The power drill is a DIYer’s best friend, capable of performing a myriad of tasks. By respecting its power, understanding its capabilities, and keeping it well-maintained, you’ll find that every project – from the smallest crafts to the most extensive renovations – becomes not just possible but enjoyable. Now, armed with this knowledge, it’s time to power up and get to work!
Whether you’re crafting a new bookshelf, installing a ceiling fan, or simply enjoying the pleasure of making something with your own two hands, the power drill is an indispensable tool that you will come to rely on. With these tips, you’re ready to venture forth and anchor your DIY legacy with security and savoir-faire. Remember, as with any skill, practice makes perfect. So, drill on, DIY superstar. Your next masterpiece awaits!
Frequently Asked Questions (FAQs)
Can I use a power drill for all types of materials?
Yes and No. While power drills are incredibly versatile, using the right drill bit is crucial for different materials. For wood, metal, and plastic, specific bits ensure efficiency and prevent damage. Remember, some materials, like tempered glass or certain types of stone, require specialized equipment beyond a standard power drill.
How often should I replace my drill bits?
It depends. The longevity of drill bits varies based on their material (e.g., high-speed steel, carbide, cobalt), the hardness of the materials they’re used on, and how frequently they’re used. Keeping an eye out for dullness or damage and using a bit sharpener can extend their life. However, once you notice a significant decline in performance, it’s time for a replacement.
Are battery-powered drills as powerful as corded drills?
Almost. Modern battery technology has significantly bridged the gap between the power of corded and cordless drills. While corded drills usually provide consistent power supply and may handle more heavy-duty tasks, the latest cordless models offer impressive power sufficient for most DIY projects, with the added bonus of portability.
Can I drill into concrete without a hammer drill?
Technically, yes, but it’s not recommended. Drilling into concrete without a hammer function is time-consuming, can wear out your bits quickly, and might even damage the drill. Hammer drills or rotary hammers are specifically designed to handle concrete and masonry, utilizing a pounding action to break up the material as the bit rotates.
What’s the best way to learn advanced drilling techniques?
Practice and patience. Invest time in mastering the basics first; then, gradually introduce more complex tasks into your projects. Online tutorials, DIY workshops, and community classes can offer valuable insight and hands-on experience. Don’t be afraid to experiment (safely) and learn from each task, no matter the outcome.
Remember, every craftsman started as a beginner, and every project offers an opportunity to improve. Keep drilling, keep learning, and don’t hesitate to reach out to fellow DIY enthusiasts for tips and encouragement. Your skill-set will grow with each project you complete!