The Beginners Guide to Using a Power Sander Safely and Effectively

Sanding is a critical step in many crafting and DIY projects. Whether you are refinishing furniture, smoothing surfaces before painting, or just getting started with woodwork, knowing how to use a power sander can significantly speed up the process and improve results. In this instructional guide, you will learn everything from the basics of handling this power tool to mastering advanced sanding techniques.
Introduction to Power Sanders
Before you start sanding away, it’s important to understand the different types of power sanders at your disposal. They may differ in shape, size, and function, but they all serve the common goal of smoothing out rough surfaces.

Types of Power Sanders
Belt Sanders: Ideal for removing a lot of material quickly on large, flat surfaces.
Random Orbital Sanders: Known for their circular sanding pattern, which minimizes visible scratch marks.
Detail Sanders: Perfect for reaching small areas and intricate designs thanks to their triangular shape.
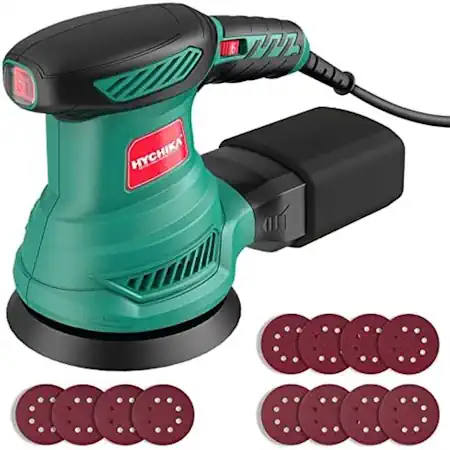
Pad Sanders: Also called finish sanders, these are gentle tools designed for fine sanding and creating polished finishes.
Each type of sander has specific strengths that can be beneficial depending on your project. Understanding these nuances will allow you to select the most appropriate tool for the task at hand.
Preparing for Sanding
The key to a successful sanding project is preparation. This section will take you through the important preparatory steps to ensure you’re ready to sand safely and efficiently.
Setting Up Your Workspace
Before you even touch the sander, prepare your workspace. Ensure it is well-lit and ventilated. Use a workbench or sawhorse to create a stable work surface just for sanding and protect it with a drop cloth to catch dust and debris.
Selecting the Right Sandpaper
The grit of the sandpaper is probably the most critical factor in achieving the desired sanding results:
Coarse Grits (Below 100): These are for heavy material removal and should only be used on the initial coarse sanding.
Medium Grits (Between 100 and 150): Ideal for smoothing and removing scratches left by the coarse grit.
Fine Grits (Above 150): Used for finishing touches before painting or staining.
Make sure your sandpaper is compatible with your sander, and always start with coarse grit sandpaper and work your way up to fine grits for the smoothest results.
Safety First
Always wear a dust mask or respirator to protect your lungs from the dust created during sanding. Use safety goggles to shield your eyes from sanding dust and flying debris, especially when sanding overhead or in tight spaces. If you are sanding for an extended period, consider wearing ear protection to prevent hearing damage.
How to Use a Power Sander
Now, you’re ready to start sanding.
Sanding Flat Surfaces
When sanding a large, flat area, use a back-and-forth motion with the sander, allowing the machine to do most of the work. Apply gentle pressure, and be sure to keep the sander flat to avoid creating divots on the surface. Start with a coarse grit to remove major imperfections and switch to finer grits as the surface becomes smoother.
Sanding Edges and Corners
Sanding edges and corners requires a bit more finesse. For edges, tilt the sander a little to avoid creating a shelf or a slope. For corners, you might need to use a sanding block or do it by hand if precision is crucial.
Achieving a Smooth Finish
To attain a sleek, uniform finish, progressively increase the grit number and continue sanding it in the direction of the grain. This will help eliminate swirls or other sanding marks. With a gentle and methodical touch, your project will be left with a professional finish.
Maintaining Sandpaper Condition
It’s essential to check your sandpaper regularly for signs of wear, tears, or erosion. Sandpaper that’s in poor condition can create uneven surfaces, reduce the efficiency of your sanding, and may even damage the material you’re working on. A worn-out piece of sandpaper won’t remove material effectively, requiring more effort and time to achieve the desired smoothness.
After using a piece of sandpaper for a while, inspect it to ensure it’s still capable of performing its task. If it looks significantly worn or damaged, replace it with a new piece to maintain a high-quality finish and efficient sanding process. Regular checks and replacements will help you achieve the best results and prolong the life of your power sander.
Using a Dust Bag
An often overlooked but vital accessory for power sanding is the dust bag. This feature is crucial for maintaining a clean workspace and reducing airborne dust, which can be harmful to your health and affect the finish of your project. Before starting your sanding work, ensure that the dust bag is securely attached to your sander. It’s designed to capture the majority of the dust created during the sanding process.
Regularly empty the dust bag, especially before it becomes full, to maintain optimal suction and dust collection efficiency. Using a dust bag not only helps keep your working area clean but also extends the lifespan of your sandpaper and sander by preventing dust from clogging the tool’s mechanisms.
Maintenance and Safety Tips
After your sanding project, it’s crucial to properly maintain your power sander. Regular cleaning and storage in a dry environment will extend the life of your tool. Always remember to unplug the sander before performing any maintenance.
Additionally, adhere to strict safety practices every time you use your power sander. Do not wear loose clothing or jewelry that could get caught in the machine. Keep your hands away from the moving parts, and never leave the sander unattended while it’s still plugged in.
Conclusion
Mastering the art of using a power sander takes time and practice. Start with small projects to gain confidence and gradually take on more challenging tasks. Remember, the safety and quality of your work should always come first. Share your sanding tips with others in the DIY community to help them achieve their project goals safely and with fantastic results.
Now, armed with this comprehensive guide, you are ready to start transforming rough surfaces into polished masterpieces. Happy sanding!
Frequently Asked Questions (FAQ)
What safety gear do I need when using a power sander?
For your safety when using these power tools, always wear a dust mask or respirator, safety goggles, and, for prolonged sanding sessions, ear protection. This gear will protect you from dust, flying debris, and noise-related hearing damage.
Can I use any type of sandpaper with my power sander?
Not all sandpapers are suitable for every power sander. Ensure the sandpaper you choose is compatible with your sander type and appropriate for the material you’re working on. Each sander model may require specific sandpaper sizes or attachments. Most sanders will work with lots of other materials as long as you have the right paper. Drywall can be sanded as long as you use light pressure and very fine grit sandpaper.
How do I know which sandpaper grit to use?
Start with coarser sandpaper grits for removing material and smoothing rough surfaces. Move to a medium grit for refining the surface and removing any scratches made by the coarse grit. Finish the job with a finer grit for the final touches, especially if you plan to paint or stain the surface.
Is it better to sand wood along or against the grain?
Always sand in the direction of the wood grain. Sanding against the grain can create scratches and damage the wood surface, leading to a less satisfying finish.
How do I clean my power sander and sanding pad after use?
Unplug your power sander before cleaning. Remove any attached sandpaper, and use a soft brush or cloth to wipe away residual dust from the sander and its components. For detailed cleaning instructions, refer to your sander’s user manual, as recommendations may vary by model.
Can I use a power sander on painted surfaces?
Yes, but it’s advisable to use a lower grit to avoid clogging the sandpaper with paint. Additionally, ensure you’re wearing appropriate safety gear to protect yourself from potentially harmful dust. Removing paint can sometimes be a slow process so we recommend you use an electric sander instead of a battery powered sander.
How can I avoid leaving swirl marks on the wood?
To avoid swirl marks, start with the correct coarse grit and gradually work your way up to finer grits. Also, ensure you’re sanding in the direction of the wood grain and not pressing too hard on the sander. Light pressure will help avoid gouging. Using a random orbital sander can also help minimize visible swirls.