Mastering the Rotary Tool: A Complete Guide for DIY Enthusiasts and Woodworkers
Rotary tools are like the carpenter’s Swiss Army knife—compact, versatile, and capable of a wide variety of tasks. If you’ve recently added this powerhouse to your toolkit or are considering it, this guide will walk you through every step of using a rotary tool effectively and, most importantly, safely. We’ll cover everything from setting up the tool to mastering it for all your woodworking and DIY needs. By the end, you’ll be ready to tackle any project with your rotary tool confidently.
Section 1: Understanding Rotary Tools
What is a Rotary Tool?
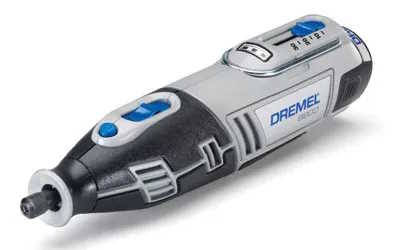
At its core, a rotary tool is a handheld power tool that utilizes a wide variety of rotary accessories for cutting, sanding, carving, engraving, or drilling into materials ranging from wood and metal to plastic and glass. These tools are known for their versatility and can often be adapted with accessories to perform specialized tasks.

The Components of a Rotary Tool
Motor: The motor is the heart of the rotary tool, delivering all the power. Rotary tools come in both corded and cordless options, with varying horsepower.
Collet or Chuck: This is the part of the tool that holds the bits or attachments. They can be either collets (for smaller bits) or chucks (for larger bits).
Speed Control: Many rotary tools offer variable speed control, typically from 5,000 to 35,000 RPM, allowing for adjustment based on the task at hand.
Housing: The casing that covers and protects the internal components.
On/Off Switch: A simple switch that activates the tool—never underestimate the simple things!
Versatile Uses of a Rotary Tool
A rotary tool’s versatility is its biggest selling point. It can be used for:
Cutting
Grinding
Sanding
Carving
Engraving
Polishing
Drilling
and more.
Section 2: Safety Precautions
Personal Protective Equipment (PPE)
Before you even think about switching on your rotary tool, ensure you are wearing:
Safety Glasses: Protect your eyes from debris.
Dust Mask: Especially crucial for sanding and grinding tasks.
Hearing Protection: The high-speed spinning can be loud, protect your hearing.
Work Gloves: Offers additional safety and grip, especially for longer projects.
Workspace Safety
Clear the Area: Ensure your work area is free of any potential hazards.
Secure Workpiece: If the material you’re working on isn’t secured, you risk it moving and causing injuries or poor-quality work.
Proper Lighting and Ventilation: Good lighting helps you see your work better, and proper ventilation ensures you’re not breathing in harmful particles.
Unplug During Changes: Any time you’re changing bits, ensure your tool is unplugged.
Tool Maintenance
Inspect Regularly: Before each use, check for any damages.
Tightening: Make sure all connections are properly tightened, especially the collets.
Lubrication: Follow the manufacturer’s guidelines for lubricating moving parts, usually not needed every time but periodically for smooth operation.
Section 3: Getting Started
Setting Up Your Rotary Tool
Plugging In: For corded models, plug the tool in and ensure your cord is out of the way.
Selecting and Attaching the Bit: The right bit for the job is key. Whether a cutting wheel or a sanding drum, select the appropriate bit and tighten it into the collet or chuck securely.
Adjusting Speed: Start with lower speeds for accuracy, then adjust as needed. Higher speeds are generally better for cutting and carving, while lower speeds are ideal for precision work and sanding.
Securing the Workpiece: Clamp your workpiece down securely before starting.
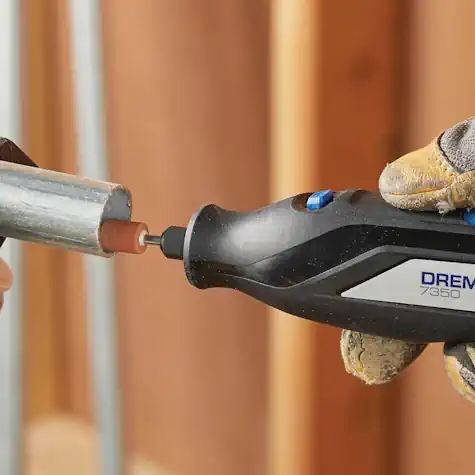
Basic Handling of the Rotary Tool
Grip: Always hold the tool with a firm grip, both hands on it when possible.
Posture: Maintain a stable stance, and ground yourself while working.
Direction: Always use the tool in a direction away from your body.
Rest When Needed: If you’re in the middle of a long project, take breaks to avoid fatigue, which can lead to accidents.
Unplugging: When not in use or when changing bits, unplug the tool for safety.
Section 4: Common Uses in Woodworking and DIY Projects
Cutting
Select the Right Bit: Cutting wheels are the go-to for precision cutting. Ensure the wheel is designed for the material you’re cutting.
Mark Your Cut: Always mark with a pencil where you’ll be cutting to ensure accuracy.
Start Cutting: Begin with a light touch at the lowest speed before gradually increasing if needed.
Secure Your Workpiece: A clamp is the safest way to keep the piece in place.
Sanding
Choose a Sanding Drum or Band: For general sanding use a sanding drum, for curved surfaces or finer details, a sanding band may be more appropriate.
Select the Right Grit: Lower grit numbers mean coarser sanding—suit the grit to your project’s needs.
Begin Sanding: Start at a lower speed to get a feel for the finesse required, and then increase speed for quicker sanding.
Keep it Moving: Avoid spending too much time in one spot, moving across the workpiece evenly to prevent uneven sanding.
Engraving and Carving
Choose the Right Engraving Bit: There are many different shapes and sizes, select one that suits your design.
Practice Control: Start slowly to ensure you can guide the tool precisely.
Depth Control: Engraving is about precision—control the tool’s depth for a consistent and professional-looking result.
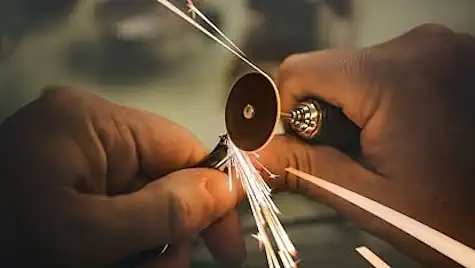
Polishing
Choose the Polishing Attachment: Felt wheels are a common choice, and you can pair them with a polishing compound for a professional shine.
Application: Apply the compound to the wheel’s edge while it’s spinning, then carefully polish the workpiece.
Multiple Stages: For high gloss, work your way through different polish strengths, starting from a heavy cut and moving to a finer polish for a mirror finish.
Section 5: Maintenance Tips
Cleaning Your Rotary Tool
Unplug the Tool: Always unplug the tool before starting maintenance.
Brush off Debris: Use a soft brush to clean off any sawdust, metal shavings, or other debris.
Compressed Air: For more stubborn dirt, a can of compressed air can be very useful, especially around the vent areas.
Storage
Dry Environment: Store the tool in a clean, dry area to prevent rust and corrosion.
Case Storage: If your tool comes with a case, use it. It’s designed to keep your tool safe and clean.
Keeping Sharp Blades
Maintain Sharpness: Periodically, swap out dull cutting tools with new ones—sharp blades are safer and more effective.
Sharpening: Some cutting tools are designed to be sharpened by special sharpening stones or tools according to the manufacturer’s guidelines.
General Tool Maintenance
Lubricate Bearings: Over time, bearings may need lubrication. Check your owner’s manual for guidance on the specific model.
Check for Loose Parts: Vibrate parts can come loose over time—periodically check and tighten as needed.
Conclusion
By following the guidelines in this guide, you have not only learned how to use a rotary tool safely and accurately but also how to maintain it properly. This enables you to enjoy crafting and repair work with a versatile tool that can enhance your DIY projects. Always remember, safety comes first—every time you pick up your rotary tool. Enjoy your crafting and the endless possibilities that come with mastering this essential tool!
FAQ: Rotary Tool Guide
What is the best way to select the right bit for my project?
The best bit depends on the material you’re working with and the task you intend to perform. Refer to the manufacturer’s guidelines and consider the hardness of the material, the type of cut, and the detail required. For general purposes, start with a multi-purpose bit and adjust based on the outcome.
How often should I lubricate my rotary tool?
Lubrication frequency depends on the model of your tool and how often you use it. Check your owner’s manual for specific recommendations. A good rule is to lubricate the moving parts when you notice decreased performance or increased noise.
Can I use my rotary tool for cutting glass?
Yes, with the right diamond-tipped bit and by using a slow speed, a rotary tool can cut glass. Ensure you wear safety glasses and gloves, and keep the glass wet to reduce dust and heat buildup.
What’s the safest way to store my rotary tool?
The safest way to store your rotary tool is unplugged, in its case, and in a dry environment. If your tool doesn’t come with a case, any sturdy box with a secure lid will do, as long as it’s kept away from moisture and extreme temperatures.
How do I know if it’s time to replace a cutting tool or bit?
Signs that it’s time to replace your cutting tool or bit include visible wear, difficulty in achieving a clean cut, or an increase in the effort required to cut through materials. It’s better to replace the bit before it becomes completely dull to maintain efficiency and safety.
Can I sharpen the bits of my rotary tool?
Some bits, particularly those made from carbide or diamond, are designed to be used until worn out and then replaced. However, high-speed steel bits can be sharpened using a proper sharpening stone or tool according to the manufacturer’s instructions.