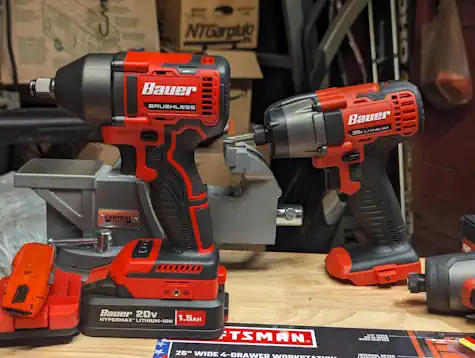
The Complete Guide on Using an Impact Driver Like a Pro
Are you venturing into the world of DIY home improvement, or simply looking to expand your toolkit and skills? An impact driver can be a game-changer – it’s more powerful and compact than a traditional cordless drill and offers a greater level of precision and control. But mastering this tool isn’t just knowing how to pull the trigger. It’s about understanding the nuances that make it efficient, safe, and capable of handling any project you throw at it.
In this detailed guide, we’ll walk through each step needed to become proficient with your impact driver. Whether you’re installing cabinets, driving bolts and screws into metal, or assembling furniture, you’ll learn how to use your tool to its full potential. This is my favorite of all the power tools I own and I use it for just about everything I need a tool for.
Introduction to Impact Drivers
An impact driver is a high-torque tool specifically designed for driving screws and other fasteners. They look very similar to a drill/driver, but they function much differently, using a combination of rotational force and quick hammering actions to power through dense materials. This allows for more efficient and quicker fastener driving, making it an easy and essential tool for construction workers and DIY enthusiasts alike.
Understanding the Parts
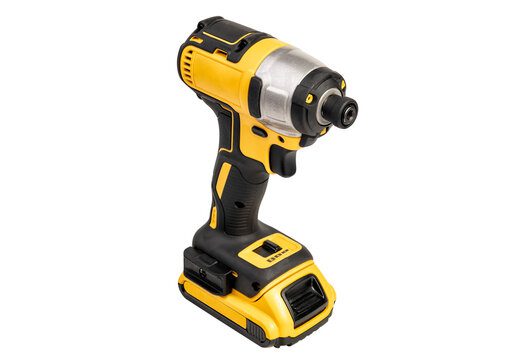
An ideal impact driver has several essential parts that you need to be familiar with:
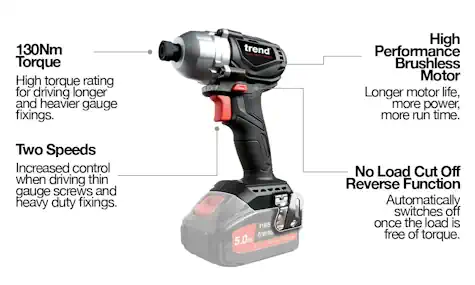
Motor: This is the heart of the machine. Modern impact drivers come with brushless motors for increased power and longer battery life.
Chuck: The chuck is the part that holds the bits. Unlike drill chucks which are three-jawed, an impact driver chuck is typically a quick-release hex-type chuck.
Battery: Most impact drivers are cordless and run on lithium-ion batteries, which provide a good balance of power and runtime.
Trigger: The trigger controls the speed of the motor. Squeezing it lightly will begin to drive the fastener more slowly, while a full squeeze will make the tool operate at full speed.
LED Light: This is often present on the front of the impact driver to provide illumination in dim workspaces.
Reverse Switch: Usually situated above the trigger, this allows you to switch the direction of rotation, moving from driving to removing fasteners.
Safety Precautions
Using an impact driver involves handling a powerful tool. Here are some key safety tips to keep in mind:
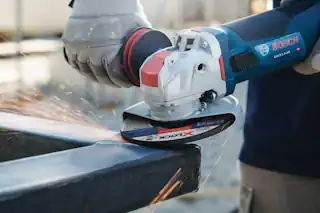
Eye Protection: Always wear safety glasses to protect your eyes from any materials that might kick up during use.
Gloves: Wear gloves to protect your hands, especially when using them for prolonged periods, as the tool can generate vibration that can be harsh on the skin and numb the feel in your hands.
Stable Environment: Use the impact driver on a stable and flat surface to ensure control and stability while working.
Secure Clothing: Avoid wearing loose clothing or jewelry that could get caught in the tool.
Choosing the Right Bits
Selecting the right bit for your project is crucial. There are different types of bits designed for specific materials and fasteners, such as Phillips, square, and Torx. Make sure you have access to a variety of bits on hand so you’re prepared for any kind of fastening job. Always check that the bit is securely in place before using the tool to avoid slippage. The repeated impacts can strip or break bits very easily. I know I have broken my share of high-torque bits.
Using the Impact Driver
Step 1: Insert the Bit
Twist the chuck sleeve counterclockwise to open the chuck.
Insert the bit into the chuck and twist the chuck sleeve clockwise to secure the bit.
Step 2: Adjust the Speed Settings
Most impact drivers have multiple settings for different torque levels. Use the switches or dials to adjust the power to the level needed for your fasteners.
Step 3: Hold and Position the Tool
Keep a firm grip on the tool with one hand on the handle and the other hand on the battery. Use your body to balance and stabilize the driver as you work.
Step 4: Drive the Fastener
Position the bit on the head of the screw or bolt and apply light pressure to keep it in place.
Pull the trigger to start driving the fastener. If the screw starts to wobble, you’re applying too much pressure. Adjust as needed.
Tips for Efficiency
To get the most out of your impact driver:
Use the Right Angle: For screws, hold the driver at a right angle to the work surface to avoid slippage.
Apply Adequate Pressure: The tool works best when there is a good amount of pressure applied to it. However, don’t press too hard, as it can cause the fastener to strip.
Preset Depth: For consistent screw depth, you can set the driver to stop driving at a certain point. This helps prevent over-driving, which can cause damage to materials.
Common Mistakes and How to Avoid Them
Some common mistakes new users make with impact drivers include:
Over-torquing: New users might be tempted to use the full power of the impact driver for every fastener, which can lead to splitting wood and stripping screws. Practice adjusting the torque settings to the appropriate level.
Wrong Bit or Setting: Using the wrong bit or torque setting can lead to frustration and less effective work. Always double-check before beginning your project.
Stripped Screw Heads
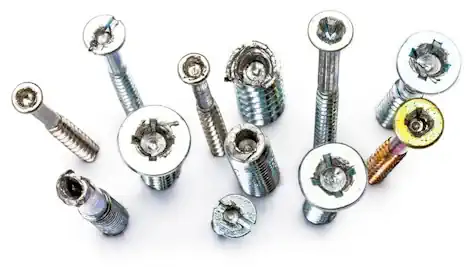
Recognizing and Managing Stripped Screws
A common issue faced when using an impact driver, especially for beginners, is the problem of stripped screw heads. This happens when the driver bit slips out of the screw head repeatedly, causing the head of long screws to lose its shape and making it difficult to drive or remove the screw. Recognizing a stripped screw early is crucial. Look for signs of wear on the screw head or difficulty maintaining bit grip.
Preventing Stripped Screws
To prevent stripping screw heads:
Choose the Correct Bit Size and Type: Ensure the bit matches the screw head perfectly. A mismatch can easily lead to slippage and strip the head.
Apply Steady Pressure: Keep firm and even pressure on the tool. Too little can cause the bit to slip, while too much can deform the screw head.
Start Slowly: Begin driving the screw at a slow speed to establish control before increasing power.
Use Quality Screws: Higher quality materials are less prone to stripping under the torque of an impact driver.
Dealing with a Stripped Screw
If you’re faced with a stripped screw, here are ways to remove it:
Use a Rubber Band: Place a wide rubber band between the bit and the stripped screw head to provide extra grip.
Drill a Small Guide Hole: Carefully drill a small indentation into the top of the screw to help the bit stay in place.
Screw Extraction Kits: These are specially designed to remove stripped or damaged screws and can be a valuable addition to your toolkit.
Understanding how to manage stripped screws will enhance your efficiency and prevent project delays. Keep these tips in mind to stay prepared for this common challenge.
Conclusion
Now that you’re familiar with the anatomy and best practices of using your impact driver, the next step is practice. Start with small, simple tasks around the house to get comfortable with the tool. Gradually, you’ll find that an impact driver is not just another power tool in your workshop; it’s a versatile instrument that can turn a labor-intensive job into a satisfyingly smooth operation. Happy building!
Frequently Asked Questions (FAQ)
Can I use regular drill bits with my impact driver?
No, regular drill bits are generally not designed to withstand the high-torque environment of an impact driver. It’s crucial to use impact-rated bits or hex-shanked bits that fit securely in the chuck to avoid damage to the tool or the workpiece.
How do I know when to replace my impact driver bits?
Look for visible signs of wear such as rounding off, burrs, or any damage that prevents the bit from fitting properly into the screw head. Decreased performance and slipping are also indicators that it’s time to replace your bits.
Can an impact driver be used for drilling holes?
While an impact driver is primarily designed for driving fasteners and screws, it can also be used for drilling tasks with the appropriate hex-shank drill bits included. However, it doesn’t replace a drill for precision applications requiring variable speed and torque control.
Why does my impact driver make a loud noise?
The loud noise is typical of impact drivers. It results from the mechanism inside the tool that creates the high-torque rotational force. This noise is normal and indicates that the impact action is engaging correctly and providing more power for the big jobs.
How do I prevent screws from breaking when using an impact driver?
To prevent breaking screws, start by selecting the correct screw for the material. Adjust the tool’s torque setting if applicable, and gradually increase the driving speed to avoid applying too much force too quickly. Using high-quality, impact and resistance-rated screws can also reduce breakage.
Is it safe to use an impact driver in wet conditions?
Avoid using power tools, including impact drivers, in wet conditions. Exposure to water can create a risk of electric shock and damage the tool. Always ensure a dry, stable environment when using your impact driver.
By addressing these common queries, users can enhance their experience with impact driver tools, achieving more efficient and safer projects.