How to Use a Drill Press: A Step-by-Step Guide for Woodworkers and Metalworkers
Introduction to the Drill Press
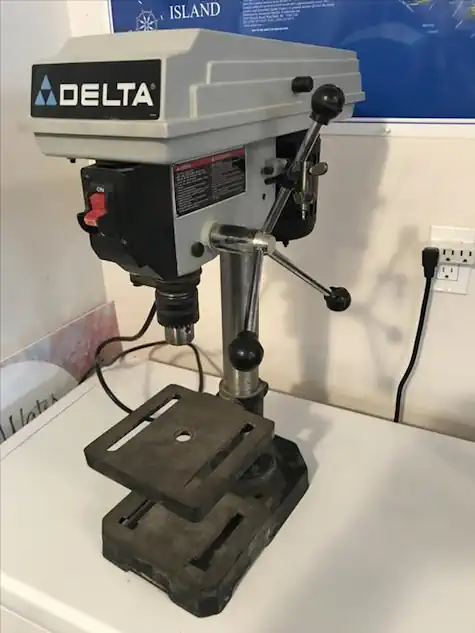
Welcome to our guide on how to use a drill press! Whether you’re a seasoned woodworker, a metalworker, or just starting with your very first drill press, understanding this versatile tool is essential. A drill press is a fixed-style power tool designed for precision drilling. Unlike handheld drills, a drill press ensures accuracy and consistency, making your projects more efficient and your results more professional.
Safety First
Before diving into any work, let’s talk about safety. Operating a drill press involves certain risks, but with the right precautions, you can mitigate them significantly.
- Personal Protective Equipment (PPE): Always wear safety glasses to protect your eyes from flying debris. Hearing protection is also recommended when working for extended periods.
- Proper Clothing: Avoid loose clothing and tie back long hair to prevent entanglement.
- Secure the Work Area: Ensure your workstation is clean and free of clutter. Keep tools and materials organized to avoid accidents.
- Emergency Preparedness: Familiarize yourself with the machine’s emergency stop button and keep a first aid kit nearby.
- Stable Setup: Ensure that the drill press is securely mounted to the workbench or floor to prevent any wobbling or movement during operation.
- Use Clamps: Always clamp down your workpiece to the drill press table to prevent it from spinning or lifting during drilling.
- Sharp Bits: Use sharp and well-maintained drill bits to reduce the effort needed and prevent the tool from slipping.
- Check Speed Settings: Adjust the drill press speed according to the material you are working with. Incorrect speed settings can cause overheating and damage.
- Proper Lighting: Make sure your workspace is well-lit. Good visibility can help you avoid mistakes and potential injuries.
- Do Not Force the Drill: Let the drill bit do the work. Applying too much pressure can cause the bit to break or the workpiece to get damaged.
- Disconnect Power When Changing Bits: Always ensure the drill press is turned off and unplugged when you change drill bits or make adjustments to the machine.
- Stay Alert: Avoid using the drill press when you are tired, under the influence of medication, or otherwise not fully alert. Concentration is key to staying safe.
Setting Up Your Workstation
A well-prepared workstation is crucial for smooth operation. Here’s how to set up your drill press:
- Securing the Workpiece: Use clamps or a vise to hold your material firmly in place. This prevents movement during drilling and ensures accuracy.
- Adjusting the Table: Position the table to accommodate the height of your workpiece. Most tables are adjustable and can be set to the desired height and angle.
- Setting the Depth Stop: Use the depth stop to control how deep the drill bit penetrates your material. This feature is especially useful for repetitive drilling tasks requiring consistent depth.
- Aligning the Drill Press Table: Ensure the drill press table is square and level with the drill bit. Use a machinist’s square or similar tool to verify the table’s alignment if necessary.
- Lubricating Moving Parts: Regularly lubricate the drill press’s moving components, such as the spindle and quill, to ensure smooth operation and avoid wear or damage.
- Selecting the Right Drill Bit: Choose a drill bit that is appropriate for the material and type of hole you need to create. For example, use high-speed steel bits for metal and brad-point bits for wood.
- Checking for Defective Bits: Inspect your drill bits for any signs of wear or damage, such as chips or dull edges. Using a defective bit can compromise the quality of your work and pose a safety risk.
- Using a Sacrificial Board: Place a piece of scrap wood or a sacrificial board under your workpiece to prevent tear-out on the bottom side of the hole and to protect the drill press table.
- Adjusting the Feed Rate: Experiment with different feed rates to find the optimal speed at which to feed the drill bit into the material. This can prevent overheating and extend the life of the drill bit.
- Installing a Fence: For repetitive drilling tasks, consider installing a fence or guide on the drill press table. This helps maintain consistent positioning and spacing between holes.
- Organizing Drill Bits: Keep your drill bits organized and within easy reach. Use a drill bit storage rack or case to minimize searching time and keep your workspace tidy.
- Dust Collection System: If possible, set up a dust collection system to keep your work area clean and reduce the amount of dust and debris in the air, which can improve visibility and safety.
Choosing the Right Drill Bit
The type of drill bit you select is critical for achieving the best results:
- For Woodworking: Use spade bits, brad point bits, or Forstner bits for clean cuts in wood.
- For Metalworking: High-speed steel (HSS) or cobalt bits are ideal for drilling into metal.
- Material Compatibility: Always match the drill bit to the material you’re working on to avoid damage to both the bit and the workpiece.
Operating Drill Presses
With your setup complete, it’s time to start drilling:
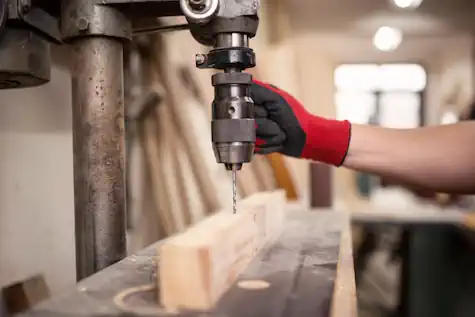
- Turning On the Machine: Ensure the drill bit is secure in the chuck, then toggle the power switch to turn on the drill press. Use the chuck key to make sure the drill bit is secure in the drill chuck.
- Lowering the Bit: Use the feed handle to lower the drill bit slowly and steadily into the material. Apply consistent pressure without forcing the bit. More pressure will not improve the results of the cutting tool.
- Drilling Holes: Keep an eye on the depth stop to ensure you don’t drill deeper than intended. Once the hole is drilled, gently raise the bit back to its starting position.
- Using a Center Punch: Before drilling, mark the spot with a centre punch to create a small indentation. This helps to guide the drill bit and prevent it from wandering off the mark. For cutting larger holes, especially in metal start with a smaller pilot hole.
- Backing Out Regularly: For deep holes, back the drill bit out periodically to remove chips and cool the bit. This practice reduces the risk of overheating and breaking the bit.
- Checking the Belt Tension: Periodically inspect and adjust the belt tension on the drill press. Proper belt tension ensures efficient power transmission and prolongs the life of the motor.
- Cooling Fluids: When drilling into metals or hard materials, use cutting or cooling fluids. This practice helps to reduce heat buildup, minimize bit wear, and ensure a cleaner cut.
- Using Drill Guides: For larger workpieces or challenging angles, use drill guides or jigs to maintain precision and accuracy during drilling.
- Emergency Procedures: Be familiar with procedures for stopping the drill press in case of an emergency. Knowing how to quickly shut off the machine can prevent accidents and injuries.
- Securing Long Workpieces: When working with extended materials, ensure they are adequately supported on both ends to prevent tipping or bending during drilling.
- Inspecting the Spindle: Regularly check the spindle for signs of wear or misalignment. A well-maintained spindle ensures better drilling accuracy and reduces machine vibration.
- Using Auxiliary Lighting: If your workspace lighting is insufficient, use additional task lighting to illuminate the drilling area clearly. Proper visibility is crucial for precision and safety.
- Cleaning the Drill Press: After each use, clean the drill press to remove dust, debris, and metal shavings. Regular cleaning prevents buildup and helps maintain the machine’s performance.
Maintenance and Care
Keeping your drill press in top condition ensures longevity and performance:
- Cleaning: After each use, clean the drill press to remove dust and debris. Use a brush or compressed air for hard-to-reach areas.
- Lubrication: Regularly lubricate moving parts, such as the spindle and feed mechanisms, to ensure smooth operation. When cutting metals you will need cutting oil to lubricate the drill bit while it cuts.
- Adjusting Belts: Check the drive belts for wear and tension. Adjust or replace them as needed to maintain optimal performance.
Conclusion
Using a drill press might seem intimidating at first, but with these steps, you’ll master it in no time. Remember, safety is always the top priority. A well-maintained and properly operated drill press can significantly enhance your woodworking or metalworking projects, providing precision and efficiency. Happy drilling!
FAQ
What is a drill press used for?
A drill press is a versatile tool used to drill precise and consistent holes in various materials, such as wood, metal, and plastic. It provides better control and accuracy compared to handheld drills, making machines using it ideal for repetitive drilling tasks and complex projects.
How do I select the right drill bit for my project?
Always match the drill bit to the material you’re working with. For woodworking, use spade bits, brad point bits, or Forstner bits. For metalworking, high-speed steel (HSS) or cobalt bits are recommended. Ensuring the right bit will prevent damage to both the bit and the workpiece.
How can I prevent the drill bit from wandering off the mark?
Before drilling, use a center punch to mark the spot, creating a small indentation. This helps to guide the drill bit and ensures accuracy by preventing the bit from slipping.
When drilling holes my drill bit is overheating, how can I prevent this?
Overheating can be caused by excessive feed rate or insufficient cooling. To prevent this, experiment with different feed rates and use cooling or cutting fluids when drilling metals. Backing out the drill bit periodically helps remove chips drilling metal and cool the bit. If the bit grabs too deeply it can snap or spin free in the drill chuck. Slowly pull the bit up and down to avoid these issues.
What is the purpose of a sacrificial board?
A sacrificial board protects both the workpiece and the drill press table by preventing tear-out on the bottom side of the hole. It also helps to extend the life of your drill bits and helps keep the press in good working order.
How often should I lubricate and clean my drill press?
Regular maintenance is crucial for performance and longevity. Clean the drill press after each use to remove dust and debris. Lubricate moving parts, such as the spindle and feed mechanisms, regularly to ensure smooth operation.
Can I use a drill press for metalworking?
Yes, a drill press can be used for metalworking. Ensure you use the appropriate high-speed steel (HSS) or cobalt bits and apply cutting or cooling fluids under drilling pressure to reduce heat buildup and ensure cleaner cuts.
What safety precautions should I take when operating a drill press?
Always wear safety goggles and protective gear. Ensure workpieces are securely clamped, familiarize yourself with emergency stop procedures, and never leave the drill press unattended while it’s running.
How do I maintain consistent positioning and spacing between holes?
Consider installing a fence or guide on the drill press table for repetitive drilling tasks. This will help maintain consistent positioning and spacing between drill holes, ensuring uniformity and precision.
Why is a dust collection system important?
A dust collection system keeps your workspace clean, reduces the amount of dust and debris in the air, and improves visibility and safety. It also minimizes cleanup time and contributes to a healthier working environment.