Mastering the Art of Using a Planer: A Guide for DIY Enthusiasts and Woodworking Beginners
Hey there, DIY enthusiasts and woodworking beginners! If you’re considering adding a planer to your woodworking toolkit or want to learn how to use one properly, you’ve come to the right place. As someone who’s been working with planers for years, I’m excited to share my knowledge and help you get the most out of this fantastic tool. In the world of power tools, the planer keeps you smooth and even.
Understanding the Role of a Planer in Your Projects
First things first, let’s talk about what a planer is and why it’s such a game-changer for your projects. Basically, planers are designed to create boards of uniform thickness by removing small amounts of material from the surface. This is especially handy when you’re working with rough-sawn lumber or need to achieve a precise thickness for your project.
Top 5 Uses for a Planer in Your Woodworking Projects
Flattening Boards: Before you can begin most projects, you need a flat surface. A planer helps you smooth out those warps and twists, ensuring you’re starting off on the right foot.
Thickness Customization: Have a project that requires boards of a specific thickness? Your planer is your best friend here, allowing you to customize board thickness to your exact needs.
Reclaiming Old Wood: Found some old wood that looks a bit too worn? A planer can help remove those aged outer layers, revealing the beautiful wood underneath, ready for a new life in your project.
Evening Out Glued Joints: When combining wood pieces, the joints might not always be flush. Running the joined boards through a planer smooths these out, giving you a seamless look.
Creating Identical Pieces: For projects that need uniformity, like shelving or paneling, a planer ensures each piece is identical in thickness, giving your work a professional finish.
Different Types of Planers for Different Needs
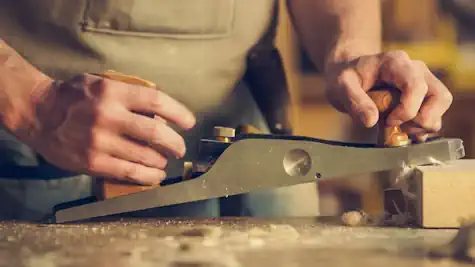
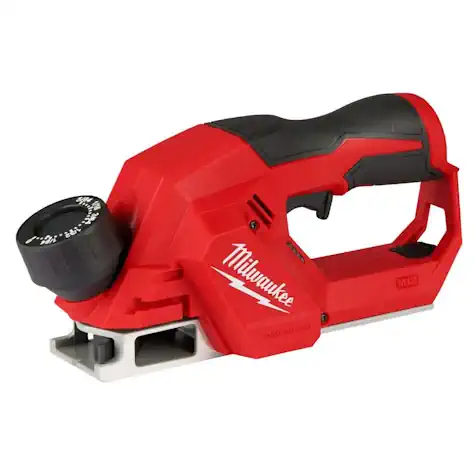
Now, there are a few different types of planers out there. Handheld planers are great for smaller tasks and hard-to-reach areas, while stationary planers are better suited for larger projects and more frequent use of power tools. Personally, I’ve found that having both in my workshop has been a lifesaver. Although I will admit I struggle with handheld planers so my tools are mostly power tools.
Here’s a closer look at the different types of planers you might consider for your workshop:
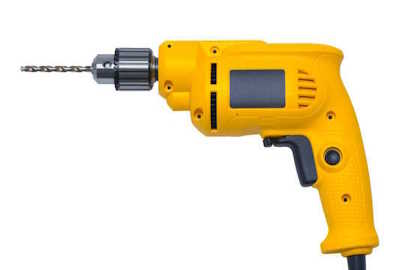
Handheld Planers: Perfect for small projects or detail work. They’re portable, easy to store, and great for beginners or those with limited space.
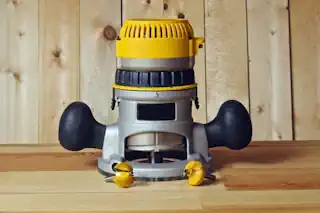
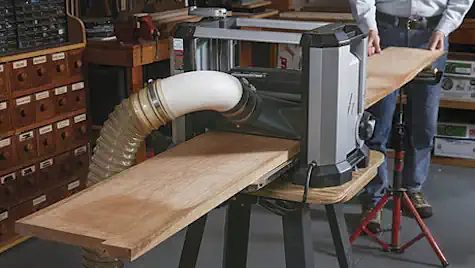
Benchtop Planers: These are the middle ground between handheld and stationary planers. Benchtop models offer more power and can handle wider boards, making them ideal for those looking to step up their woodworking game without committing to a large piece of machinery.
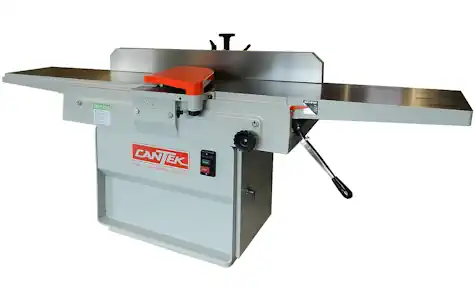
Stationary Planers: Designed for heavy-duty use, these are the workhorses of the planer world. They can handle larger volumes and sizes of wood, providing consistent results across bigger projects. Must-have tools for serious woodworkers with the space to accommodate them.
Thickness Planers: Specifically designed to shave off thin layers to make boards uniform in thickness, these are invaluable for larger projects that require consistency across multiple pieces of wood. I’ve observed these tools working an entire tabletop in a single pass. Man that was cool.
Jointer-Planer Combo: These versatile machines combine the abilities of a jointer and a planer into one, saving space and offering the ability to straighten and smooth boards in one go. Ideal for workshops where space is at a premium but functionality can’t be compromised.
Each type of these tools has its own set of advantages, so consider your project needs, workshop space, and budget when choosing to buy the right planer for you.
Safety First: Precautions while using a Planer
Before we dive into the nitty-gritty of using a planer, let’s talk safety. Trust me, you don’t want to skip this part! Always wear protective gear, including eye and ear protection, and make sure your workspace is clean and free of clutter. It’s also crucial to keep your hands away from the cutting head and never reach inside the planer while it’s running. These tools will take a finger off in the blink of an eye.
Top 10 Safety Concerns for Using a Planer:
Always Wear Safety Gear: Protection for your eyes and ears is a must. Don’t forget to wear safety glasses and ear protection to guard against flying debris and loud noise.
Keep the Area Clean: A clutter-free workspace prevents accidents. Make sure there’s nothing around that you could trip over or that could interfere with the operation of your planer.
Use Push Blocks or Sticks: Keep your fingers safe by using push blocks or sticks when feeding wood into the planer. This keeps your hands away from the blades in these tools.
Never Reach Over the Blades: Even when the planer is off, avoid reaching over the blades. This habit ensures you don’t accidentally cut yourself on the sharp blades.
Avoid Loose Clothing and Jewelry: Loose items can get caught in the planer, posing a serious risk. Keep clothing fitted and remove all jewelry before starting.
Check the Wood for Foreign Objects: Nails, screws, or other metal objects in the wood can damage the planer’s blades and cause harm. Always inspect and remove them beforehand.
Use the Right Speed and Feed Rate: Pushing wood too quickly or slowly through the planer can cause kickback or damage to the wood and machine. Follow the manufacturer’s guidelines for this tools speed and feed rate.
Maintain Your Planer: Regular maintenance, such as keeping blades sharp and ensuring adjustments are accurate, not only ensures the longevity of your planer but also your safety.
Stay Focused: Never operate these tools while tired or under the influence of drugs or alcohol. Your full attention is necessary to safely use the machine.
Read the Manual: Familiarize yourself with the specific model of planer you’re using by reading the manual. Understanding its features and safety recommendations is crucial for safe operation.
Remember, taking these precautions seriously not only ensures your safety but also helps you achieve the best results in your woodworking projects.
Setting up Your Planer: A Step-by-Step Guide
Okay, now that we’ve covered the basics let’s walk through setting up your planer. Start by adjusting the cutting depth – this determines how much material will be removed with each pass. It’s best to make several shallow passes rather than trying to remove too much at once. Next, set your infeed and outfeed tables to support your material as it passes through the machine.
Here are the steps to get your planer ready for your next project:
Check the Working Area: Ensure your planer is set on a stable, flat surface with enough space around for safe operation.
Inspect the Blades: Make sure the planer’s blades are sharp and securely in place. Dull or loose blades can affect the finish of your wood and pose a safety hazard.
Set the Cutting Depth: Begin by adjusting the cutting depth to control how much material you want to remove. Starting with a smaller amount is safer and allows for more precision.
Adjust Infeed and Outfeed Tables: These should be level with the planer’s bed to support the wood as it goes through the planer, preventing snipe (a deeper cut at the beginning or end of the board).
Install Dust Extraction: Connect a vacuum or dust collector to manage sawdust and keep your working environment clean.
Power Up Carefully: Once everything is set, turn on the planer without any wood to ensure all parts are moving correctly.
Test with Scrap Wood: Before using on your final piece, run a piece of scrap wood to check the setup. This allows you to adjust as needed without risking your project material.
Use Safety Gear: Lastly, don’t forget to put on your safety glasses and hearing protection before you start planing.
Following these steps can help you achieve a smooth, even finish on your woodworking projects, ensuring both the quality of your work and your personal safety.
When you’re ready to start planing, remember to feed your material through at a consistent rate. This helps ensure an even finish and prevents damage to both your workpiece and the planer itself. If you’re working with longer boards, it’s a good idea to have someone assist you by supporting the other end.
Maintenance: Key to Long-lasting Performance
To keep your planer running like a dream, regular maintenance is key. This includes sharpening the blades when they become dull and keeping the machine clean and free of dust and debris. If you do run into any issues, don’t panic! Common problems like snipe (where the end of the board is slightly thinner) or chatter marks can often be resolved with a few simple adjustments.
Here are some essential maintenance steps to ensure your planers performance remains top-notch:
Clean After Every Use: Wipe down the planer after each use to remove any wood chips, dust, or debris. This helps prevent buildup that could affect its performance.
Regularly Inspect Blades: Check the blades for dullness or damage regularly. Sharp blades are crucial for smooth, efficient planing.
Lubricate Moving Parts: Apply lubricant to moving parts as specified in your planer’s manual to keep everything running smoothly and to prevent rust.
Ensure Blades Are Properly Installed: After changing or sharpening blades, make sure they are securely and evenly installed to prevent uneven planing.
Check for Wear and Tear: Inspect belts, bearings, and other parts for signs of wear. Replace any components that are worn out to maintain optimal performance.
Adjust for Precision: Regularly check and adjust the infeed and outfeed tables, as well as the depth setting, to ensure precision in your planing tasks.
Test Planer Performance: Occasionally use a piece of scrap wood to test the planer’s performance. Make adjustments as needed to achieve the desired outcome.
Review the Planer’s Manual: Reference back to the planer’s manual frequently to familiarize yourself with specific maintenance recommendations and troubleshooting tips.
Maintaining your planer with these steps will help extend its life and keep it running efficiently, ensuring that your woodworking projects continue to turn out beautifully.
Conclusion: Confidence, Practice, and Happy Planing!
Well, there you have it – a crash course in using a planer! I hope that this guide serves as a stepping stone for you on how to use a planer and tackle your next woodworking project with full confidence. Working with smooth, evenly-sized pieces of wood is like magic. Of course, if you are into metal there are metal planers but that is a different conversation. Remember, practice makes perfect. Don’t be afraid to experiment and learn as you go. Happy planing!
Frequently Asked Questions (FAQs)
What should I do if my planer starts making strange noises?
Strange noises can indicate a number of issues, such as loose parts or dull blades. First, turn off the planer and unplug it. Check that all parts are secure and inspect the blades for any damage or dullness. If the problem persists after troubleshooting, consult the manual or contact a professional for help.
How often should I change or sharpen the blades?
The frequency depends on how often you use your planer and the type of wood you’re working with. A good rule of thumb is to inspect your planers and blades before each use and to sharpen or replace them when you notice a decline in performance or quality of finish.
Can I plane painted or treated wood?
It’s generally not recommended to plane items with painted or treated wood because it can dull the blades more quickly and may release harmful chemicals. If you must plane such materials, ensure you have appropriate safety gear and consider replacing the blades afterward.
What causes snipe, and how can I minimize it?
Snipe is caused by the unsupported end of a board being cut deeper as it enters or exits the planer. You can minimize snipe by carefully adjusting your infeed and outfeed tables to fully support the board throughout the planing process. Using a longer outfeed table or having someone support the end of the board can also help.
Why is my wood chipping instead of being smoothly planed?
Chipping can occur for several reasons, such as using dull blades, setting the cutting depth too deep, or feeding the wood too quickly. Check your blade sharpness, adjust the cutting depth to a shallower setting, and feed the wood through at a slower, steady rate.
How do I prevent the planer from overheating?
To prevent overheating, avoid running the planer for extended periods without breaks, especially during heavy-duty tasks. Also, keep the planer clean and well-maintained to ensure optimal airflow and cooling.
Is there any specific safety gear I should wear while operating planer power tools?
Yes, always wear safety goggles to protect your eyes from wood chips and dust. Hearing protection is also important due to the high noise levels of planers. Additionally, wearing a dust mask can help protect your lungs from fine wood particles.
Remember, the key to successful planing is patience, precision, and practice. Don’t hesitate to reach out to fellow woodworking enthusiasts or professionals for advice and support. Happy woodworking!